TL;DR: A practical, step-by-step guide on wiping a Windows NTFS hard drive and preparing it for native Arch Linux use. The post walks you through using cfdisk to recreate the partition table, forcing a format with mkfs.ext4 to overwrite stubborn NTFS signatures, configuring auto-mounting via /etc/fstab, and resolving the common ext4 root-ownership permission block so that the drive is fully usable by your user account.
I recently decided to repurpose an internal 1TB hard drive that was formatted as NTFS for my Arch Linux system. I didn’t care about the existing data; I just wanted a clean, native Linux filesystem (ext4) to replace the old Windows structure.
It seemed straightforward, but I ran into a few hiccups—like the drive “remembering” it was NTFS, and some confusion around permissions after mounting. Here is the step-by-step process I used to get it running, mounted, and fully writable.
My Mounting Strategy
Before we start, a quick note on how I organize my drives. I prefer to mount them based on their size and type so I always know what I’m looking at. For example:
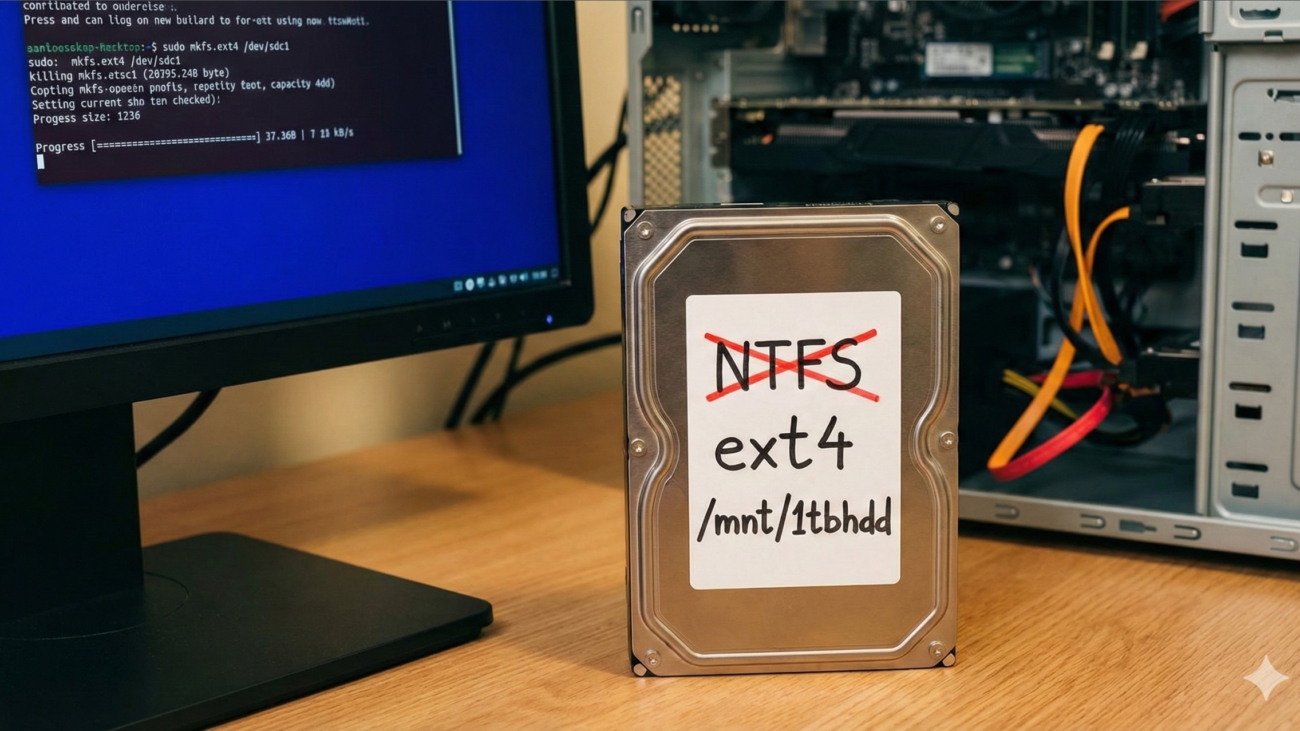
/mnt/1tbssd/mnt/250gbssd/mnt/1tbhdd(The drive we are fixing today)
You can name your mount points whatever you like, but I find hardware-based naming helps when managing multiple disks.
Step 1: Identify the Drive
First, ensure you are targeting the correct physical drive. I used lsblk to list all block devices.
Bash
lsblk
In my case, the 1TB HDD was /dev/sdc. Warning: Double-check this identifier. The next steps will permanently destroy all data on that specific drive.
Step 2: The Partition Table (cfdisk)
I used cfdisk because it offers a visual interface in the terminal.
Bash
sudo cfdisk /dev/sdc
- Select the gpt label type.
- Delete the existing NTFS partitions.
- Create a [ New ] partition using the full size of the disk.
- Important: Verify the [ Type ] is set to “Linux filesystem”.
- Select [ Write ], type
yes, and [ Quit ].
The Hiccup: “It still thinks it’s NTFS?”
cfdisk rewrites the partition map, but it doesn’t scrub the actual data on the disk. When I tried to format the drive, the system warned me that it still detected NTFS signatures.
Step 3: Formatting (The Fix)
The fix is to force the format. I ran the mkfs command for ext4 on the new partition (/dev/sdc1):
Bash
sudo mkfs.ext4 /dev/sdc1
The system threw this warning:
/dev/sdc1 contains a ntfs file system labelled 'Main Storage'Proceed anyway? (y,N)
I typed y and hit Enter. This overwrote the old NTFS headers with a fresh ext4 filesystem.
Step 4: Create the Mount Point
I created the folder where the drive will live.
Bash
sudo mkdir -p /mnt/1tbhdd
Step 5: Automounting (fstab)
To make the drive mount automatically on boot, I added it to /etc/fstab.
First, I grabbed the UUID:
Bash
sudo blkid
(Copy the string after UUID= for your partition).
Then I edited fstab:
Bash
sudo nano /etc/fstab
And added this line at the bottom:
Plaintext
# 1TB HDD Storage
UUID=your-uuid-here   /mnt/1tbhdd   ext4   defaults   0 2
Step 6: Test Without Rebooting
Instead of rebooting to test if it worked, you can tell the system to mount everything listed in fstab immediately:
Bash
sudo mount -a
Troubleshooting Note: If you run this without sudo, you will get an error saying mount: /mnt/1tbhdd: must be superuser to use mount. Mounting drives is a system admin task, so you always need sudo!
Step 7: The Final “Root Ownership” Fix
This is where I got stuck for a minute. After running the mount command, I tried to create a folder on the new drive, but I couldn’t.
If you run ls -l /mnt/1tbhdd, you’ll see the drive is owned by root.
This is normal for ext4. Permissions are stored inside the filesystem. Since root formatted the drive, root owns the drive.
To fix this, you must change ownership while the drive is mounted:
Bash
sudo chown -R $USER:$USER /mnt/1tbhdd
Now, the drive belongs to you. Because this change is written to the filesystem itself, it will “stick” and you won’t have to do it again, even after rebooting.